Einfach mal Perl/Tk installieren und dann die Quellcodes ausführen.
Labels sind Widgets die Text oder Bilder beinhalten. Text, Schriftart, Ausrichtung, Farbe usw. können angepasst werden.

#!perl
use strict;
use warnings;
use Tk;
my $mw = tkinit();
# Create three different labels
my $l1 = $mw->Label(-text => "This is what the default label looks like");
my $l2 = $mw->Label(
-text => "This is a yellow label on a blue background",
-foreground => 'Yellow',
-background => 'Blue',
);
my $l3 = $mw->Label(
-text => "This is a label in Times 24 font",
-font => [-family => 'times', -size => 24],
);
# Put them in the window in row order
$l1->grid(-row => 0);
$l2->grid(-row => 1);
$l3->grid(-row => 2);
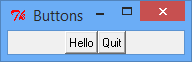
$mw->MainLoop;Buttons sind wie Labels, nur dass sie auf Mausklicks reagieren. Ein Befehl oder ein Callback wird ausgeführt, wenn der Button angeklickt wird.
#!perl
use strict;
use warnings;
use Tk;
my $mw = tkinit();
my $text = 'Hello';
my $b1 = $mw->Button(
-text => "Hello",
-command => sub{ doIt(\$text); },
);
my $b2 = $mw->Button(
-text => "Quit",
-command => sub{ $mw->destroy(); },
);
# Put them in the window in row order
$b1->grid(-row => 0, -column => 0,);
$b2->grid(-row => 0, -column => 1,);
$mw->MainLoop;
sub doIt {
my $text_ref = shift;
my $caller = $Tk::widget;
if( $$text_ref eq "Hello" ) {
$$text_ref = "Goodbye";
} else {
$$text_ref = "Hello";
}
$caller->configure( -text => $text );
return;
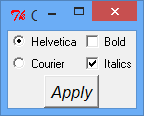
} # /doItCheckbuttons erlauben eine Statusauswahl, wohingegen Radiobuttons alle an eine Variable gebunden werden. Nachstehendes Beispiel zeigt, wie beides verwendet werden kann, um eine Schrift zu formatieren.
#!perl

use strict;
use warnings;
use Tk;

my $mw = tkinit();

my $font = 'helvetica';
my $weight = 1;
my $slant = 1;

my $c1 = $mw->Checkbutton(
	-text => 'Bold',
	-variable => \$weight,
	-anchor => 'w',
);
my $c2 = $mw->Checkbutton(
	-text => 'Italics',
	-variable => \$slant,
	-anchor => 'w',
);

my $r1 = $mw->Radiobutton(
	-text => 'Helvetica',
	-variable => \$font,
	-value => 'helvetica',
);
my $r2 = $mw->Radiobutton(
	-text => 'Courier',
	-variable => \$font,
	-value => 'courier',
);

my $b = $mw->Button(
	-text => 'Apply',
    -command => sub{ applyIt($weight, $slant); },
);

#The "sticky" option aligns items to the left (west) side
$c1->grid(-row => 0, -column => 1, -sticky => 'w');
$c2->grid(-row => 1, -column => 1, -sticky => 'w');
$r1->grid(-row => 0, -column => 0, -sticky => 'w');
$r2->grid(-row => 1, -column => 0, -sticky => 'w');
$b->grid(-row => 2, -column => 0, -columnspan => 2);

$mw->MainLoop();

sub applyIt {
	my ($w, $s) = @_;
    my $caller = $Tk::widget;
	my $current_weight = ($w ? 'bold' : 'normal');
	my $current_slant = ($s ? 'italic' : 'roman');
	$caller->configure( -font => "-family $font -weight $current_weight -slant $current_slant" );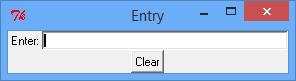
} # /applyItEin Entry ist ein Feld in das man schreiben kann. Das Beispiel kombiniert ein Label und ein Entry, um ein Formular zu erzeugen.
#!perl

use strict;
use warnings;
use Tk;

# Creates an entry that you can type in.
# focus puts the cursor in the entry, and he button clears it

my $mw = tkinit();

my $name = '';

my $l = $mw->Label(-text => "Enter:");
my $e = $mw->Entry(
	-width => 40,
	-relief => 'sunken',
	-bd => 2,
	-textvariable => \$name,
);
$e->focus();
my $b = $mw->Button(
	-text => 'Clear',
	-command => sub{ $name = ""; },
);

# Put them in the window in row order
$l->grid(-row => 0, -column => 0,);
$e->grid(-row => 0, -column => 1,);
$b->grid(-row => 1, -column => 0, -columnspan => 2);
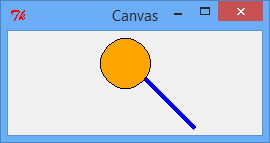
$mw->MainLoop;Eine Canvas ist eine sehr mächtige Zeichenfläche. Es können nicht nur Objekte (wie Linien, Kreise usw.) gezeichnet werden, sondern es können auch ganz normale Widgets (z.B. Buttons) platziert werden. Maus-Events können an Objekte auf der Canvas gebunden werden. So können die Objekte beispielsweise auf der Canvas bewegt werden, oder das Programm kann auf einen Mausklick reagieren.
#!perl

use strict;
use warnings;
use Tk;

# An example of canvases, items, and dragging things around

my $mw = tkinit();

my $c = $mw->Canvas(
	-width => 250,
	-height => 100,
);
my $myoval = $c->createOval(0, 0, 50, 50, -fill => 'orange');
my $myline = $c->createLine(50, 50, 100, 100, -fill => 'blue', -width => 4);

$c->bind($myoval, '<B1-Motion>', sub{ moveit($myoval); });
$c->bind($myline, '<B1-Motion>', sub{ moveit($myline); });

$c->grid(-row => 0, -column => 0);

$mw->MainLoop;

sub moveit {
	my $object = shift;
	my ( $x, $y ) = ( $Tk::event->x, $Tk::event->y );
	$c->coords($object, $x - 25, $y - 25, $x + 25, $y + 25);
} # /moveitListboxen sind scrollbare Listen aus Textzeilen, die selektiert werden können.
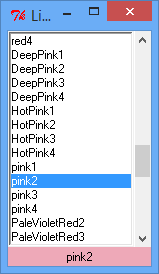
#!perl

use strict;
use warnings;
use Tk;
use Tk::Listbox;

# Create a scrollable listbox containing color names. When a color is
# double-clicked, the label on the bottom will change to show the
# selected color name and will also change the background color

my $mw = Tk::MainWindow->new();

my @werte = qw(
	gray60 gray70 gray80 gray85 gray90 gray95
    snow1 snow2 snow3 snow4 seashell1 seashell2
    seashell3 seashell4 AntiqueWhite1 AntiqueWhite2 AntiqueWhite3
    DarkSlateGray1 DarkSlateGray2 DarkSlateGray3
    aquamarine4 DarkSeaGreen1 DarkSeaGreen2 DarkSeaGreen3
    PaleGreen1 PaleGreen2 PaleGreen3 PaleGreen4 SpringGreen1
    green3 green4 chartreuse1 chartreuse2 chartreuse3
    chartreuse4 OliveDrab1 OliveDrab2 OliveDrab3 OliveDrab4
    coral2 coral3 coral4 tomato1 tomato2 tomato3 tomato4
    red4 DeepPink1 DeepPink2 DeepPink3 DeepPink4 HotPink1
    HotPink2 HotPink3 HotPink4 pink1 pink2 pink3 pink4
    PaleVioletRed2 PaleVioletRed3 PaleVioletRed4 maroon1
    VioletRed4 magenta1 magenta2 magenta3 magenta4 orchid1
    orchid2 orchid3 orchid4 plum1 plum2 plum3 plum4
    DarkOrchid1 DarkOrchid2 DarkOrchid3 DarkOrchid4 purple1
    MediumPurple3 MediumPurple4 thistle1 thistle2 thistle3
);

my $listbox = $mw->Scrolled('Listbox',
    -scrollbars => 'e',
    -height => 15,
    -listvariable => \@werte,
)->pack(-fill => 'x',);

my $label = $mw->Label(-text => 'click a listbox-value', -bg => 'green',)->pack(-fill => 'x',);

$listbox->bind('<<ListboxSelect>>', sub{
	$label->configure(
		-text => $listbox->get($listbox->curselection()),
		-background => $listbox->get($listbox->curselection()),
	);
});

$mw->MainLoop();Scales sind GUI-Steuerelemente die es erlauben Werte auf einer Skala einzustellen.
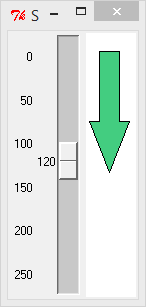
#!perl

use strict;
use warnings;
use Tk;
use Tk::Scale;

my $mw = Tk::MainWindow->new();

# Use a scale to set the height of an arrow drawn on a canvas

my $zahl = 42;

my $scale = $mw->Scale(
    -from => 0,
    -to => 250,
    -showvalue => 1,
    -tickinterval => 50,
    -command => \&set_height,
    -variable => \$zahl,
);

my $canvas = $mw->Canvas(
    -width => 50,
    -bg => 'white',
);
my $poly = $canvas->createPolygon(
    0,0,1,1,2,2,
    -fill => 'SeaGreen3',
    -tags => ['poly'],
);
my $line = $canvas->createLine(
    0,0,1,1,2,2,0,0,
    -fill => 'black',
    -tags => ['line'],
);

$scale->pack(
    -fill => 'y',
    -expand => 1,
    -side => 'left',
);

$canvas->pack(-fill => 'y', -expand => 1,);

$mw->MainLoop();

sub set_height {
    my $height = $zahl + 21;
    my $y2 = $zahl - 30;

    if( $y2 < 21 ) {
        $y2 = 21;
    }

    $canvas->coords($poly, 15, 20, 35, 20, 35, $y2, 45, $y2, 25, $height, 5, $y2, 15, $y2, 15, 20);
    $canvas->coords($line, 15, 20, 35, 20, 35, $y2, 45, $y2, 25, $height, 5, $y2, 15, $y2, 15, 20);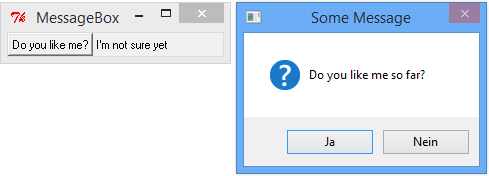
}Eine messageBox ist ein Pop-up-Fenster das eine Frage stellt und auf eine Antwort wartet.
#!perl

use strict;
use warnings;
use Tk;
use Tk::Scale;

my $mw = Tk::MainWindow->new();

my $button = $mw->Button(
	-text => "Do you like me?",
	-command => \&show_the_dialog,
)->pack(-side => 'left',);

my $label = $mw->Label(
	-text => 'I\'m not sure yet',
)->pack(-side => 'left',);

$mw->MainLoop();

sub show_the_dialog {
	my $answer = $mw->messageBox(
		-icon => 'question',
		-type => 'yesno',
		-title => 'Some Message',
		-message => 'Do you like me so far?',
	);
	$label->configure(-text => $answer);
} # /show_the_dialog
getOpenFile ist ein Pop-up-Widget mit dem eine Datei ausgewählt werden kann. Es gibt auch eine ähnliche Funktion namens getSaveFile.

#!perl

use strict;
use warnings;
use Tk;
use Tk::Scale;

my $mw = Tk::MainWindow->new();

my $button = $mw->Button(
	-text => "Select a file",
	-command => \&show_file_dialog,
)->pack(-side => 'left',);

my $label = $mw->Label(
	-text => 'No file yet',
)->pack(-side => 'left',);

$mw->MainLoop();

sub show_file_dialog {
	my @ext = (
        ["All Source Files",	[qw/.pl .pm .pmx/]],
        ["Image Files",			[qw/.gif .png .jpg/]],
        ["All files",			[qw/*/]],
	);
	my $answer = $mw->getOpenFile(
		-filetypes => \@ext,
	);
	$label->configure(-text => $answer);
} # /show_the_dialog
chooseColor ist ein Pop-up-Widget durch das eine Farbe ausgewählt werden kann.
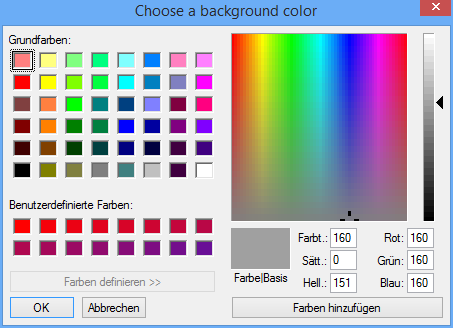
#!perl

use strict;
use warnings;
use Tk;
use Tk::Scale;

my $mw = Tk::MainWindow->new();

my $button = $mw->Button(
	-text => "Choose a color...",
	-command => \&show_color_dialog,
)->pack();

$mw->MainLoop();

sub show_color_dialog {
	my $color = $mw->chooseColor(
		-title => 'Choose a background color',
	);
	$button->configure(
		-bg => $color,
	);
	return;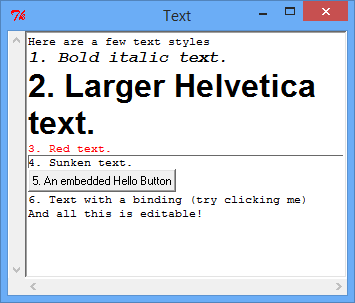
} # /show_color_dialogDas Text-Widget ist eine Art Editor. Das Erscheinungsbild von Text kann geändert werden, bestimmte Textabschnitte können auf Button-Klicks (Ereignisse) reagieren, und es ist sogar möglich andere Widgets in den Texteditor einzufügen.
#!perl

use strict;
use warnings;
use Tk;
use Tk::Text;

my $mw = tkinit;
my $text = $mw->Scrolled('Text',
	-width => 40,
	-height => 10,
	-wrap => 'word',
)->pack(-expand => 1, -fill => 'both',);

# Set up the tags
$text->tagConfigure('bold_italics',
    -font => [
	    -family => 'courier',
	    -size => 12,
	    -weight => 'bold',
	    -slant => 'italic'
    ],
);
$text->tagConfigure('big' => -font => [-family => 'helvetica', -size => 24, -weight => 'bold']);
$text->tagConfigure('color1' => -foreground => 'red');
$text->tagConfigure('sunken' => -relief => 'sunken', -borderwidth => 1);
$text->tagBind('Ouch', '<1>', sub{ $text->insert('end', "Ouch! "); });

# Now insert text that has the property of the tags
$text->insert('end', "Here are a few text styles\n");
$text->insert('end', "1. Bold italic text.\n", 'bold_italics');
$text->insert('end', "2. Larger Helvetica  text.\n", 'big');
$text->insert('end', "3. Red text.\n", 'color1');
$text->insert('end', "4. Sunken text.\n", 'sunken');
my $btn = $text->Button(
	-text    => "5. An embedded Hello Button",
    -command => sub{ $text->insert('end', "Hello "); },
);
$text->windowCreate('end', -window => $btn);
$text->insert('end', "\n");
$text->insert('end', "6. Text with a binding (try clicking me)", 'Ouch');
$text->insert('end', "\nAnd all this is editable!");

$mw->MainLoop;Auf den anderen Seiten von perltk.de, in den Perl/Tk-Manpages, der Widget-Demo oder in Perl/Tk-Büchern finden sich auch folgende Themen: